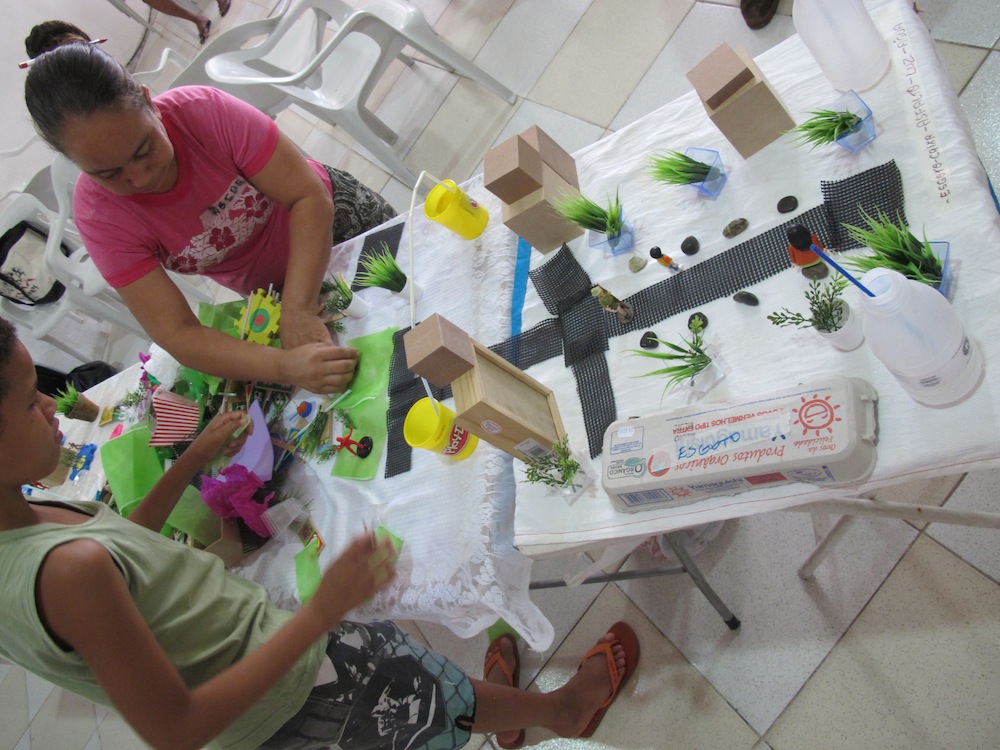
‘City as Play’ Community-Centered Design Workshop
‘City as Play’ is a simple yet effective activity that allows people to use the materials they have at their disposal to plan, create and share ideas and solutions for their community’s infrastructure and urban problems. The goal of ‘City as Play’ is to reassure people that they indeed have the “stuff” it takes to come up with great ideas that lead to building a better community.
Using a variety of small objects found in their daily lives, residents can create and then visualize their community evolving. It is an empowering activity as residents begin to see themselves as problem-solvers in their own neighborhoods. This can be a learning activity for all involved, as well as a platform for residents to share ideas they otherwise may not have a chance to. All age groups can and should participate.
Based on James Rojas’ “City as Play Design Workshop,” the following are 6 easy steps that can be followed when facilitating a workshop with community residents:
1. Organize materials, space, and time
Gather hundreds of diverse small and tiny objects or pieces in a range of colors, sizes and materials. Examples may include plastic straws, yogurt cups, bottle caps, cardboard boxes, foam pieces, mini-figurines, construction paper, legos, strings, etc. The more variety the better. Clean all items. Then, gather enough tables, and large enough, so that people can move around them easily and have enough space to mount their models. Picture 4-5 people per table. One hour for the activity is a good amount of time for a moderate-sized group.
2. Ask an inspirational question
Moderators are encouraged to ask an inspirational question. This gets participants’ imaginations churning and increases the chances of engagement and creative outcomes. Some examples include: What are some potential solutions to the challenges in your community? What would an ideal street look like in your community? What would make you want to walk around in your neighborhood? What is one thing you have always hoped to have in your neighborhood?
3. Provide general instructions to participants
Loose criteria and general instructions work best. Rigid requirements or specific instructions risk losing the creative potential–and point–of the exercise. The one rule: people have to build using the physical materials they have in front of them, they cannot simply draw the model. This way they are responding creatively with new materials which inspire new ideas rather than those they may already have come up with.
4. Build!
Participants get 20 minutes to build their models on the tables in front of them. Facilitators should walk around responding to any questions that come up and encouraging those who seem shy or unsure of what to do.
5. Share ideas
Following the 20 minute building exercise, all participants are given one minute to discuss and share their model with the entire group, explaining their train of thought and choices as they built their model.
6. Synthesize
At the end of the activity 20 minutes are given to creating a mashup, joining the individual models into a more general combined one. This can be done by asking participants at each table to select the best aspect of each person’s model and combining those into a single model. Then, each table can share with the entire group why they chose to create that particular model. An alternate way to synthesize is for facilitators to organize the different ideas and models into various categories. These can be written down on a large blackboard or paper for participants to visualize their relationships and make sense of them.
Check out this video:

